PagerDuty + Statuspal status page
Automate your Statuspal incident communication from your PagerDuty incidents.
Configure rules in your Statuspal account to determine how/when incidents should be reported in your status page.
Incidents get automatically resolved in your status page when they are resolved in PagerDuty.
How it Works
Statuspal will configure a PagerDury webhook, which will cause PagerDuty to notify Statuspal about incident events.
According to the rules configured in Statuspal incidents will be created/resolved automatically whenever they are triggered/aknowledged and resolved in PagerDuty.
Requirements
You'll need a PagerDuty Admin role in order to create an API key. If you do not have this role, please reach out to an Admin or Account Owner within your organization to configure the integration.
You'll need a Statuspal Admin or owner role in order to configure this integration. If you do not have this role, please reach out to an Admin or Account Owner within your organization to configure the integration.
Support
If you need help with this integration, please contact [email protected].
Integration Walkthrough
In PagerDuty
Go to you PagerDuty dashboard
Click on Integrations > API Access Keys
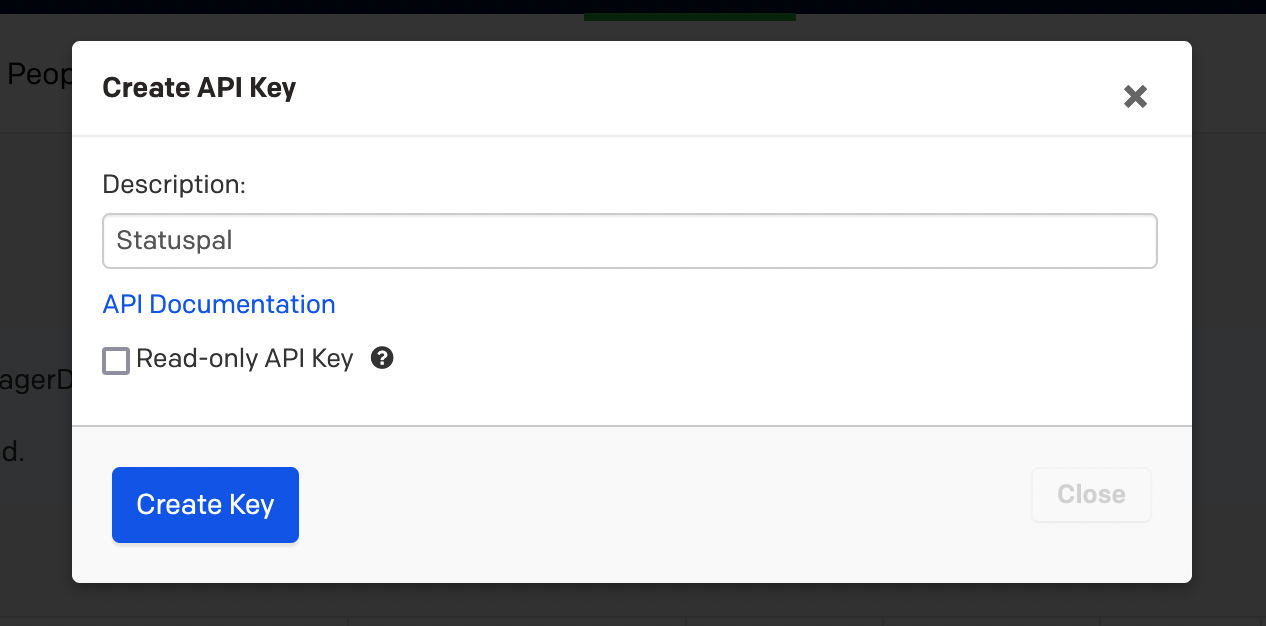
Click on Create API Key
In the modal form enter Statuspal as the description, and make sure to uncheck "Read-only API Key" (we need write access to PagerDuty in order to create webhooks with their API).

PagerDuty API key for status page & incident automation Click on Create Key
A new modal with your newly created API key will appear, copy it and make sure to save it for the next step.
In Statuspal
From your status page's Dashboard click on Integrations in the sidebar.
Click on New integration and select PagerDuty from the service dropdown.
Enter your PagerDuty API key and click on Create.
You should now be able to start configuring your rules.

PagerDuty Integration Rules
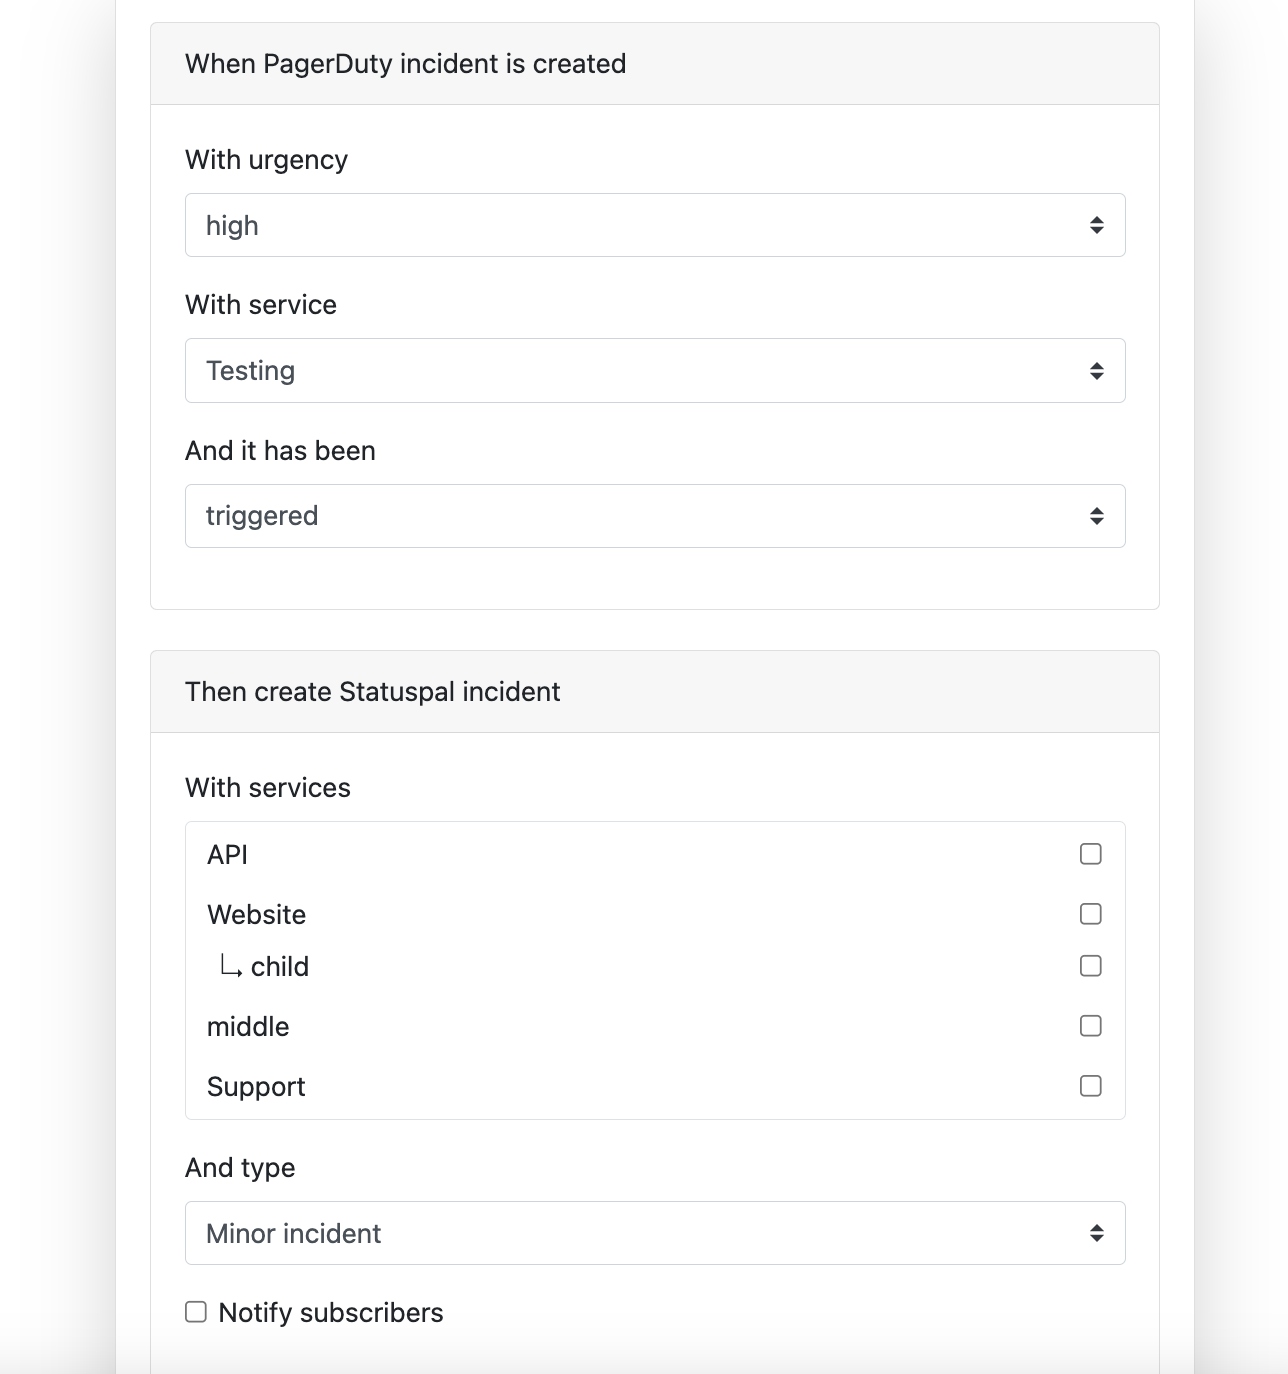
In order to automate Statuspal incident creation and resolution from PagerDuty you need to configure what services and severity of PagerDuty incidents should be monitored and what services and severity should the corresponding Statuspal incident be created with.
You can also choose to notify subscribers automatically or not in this step.

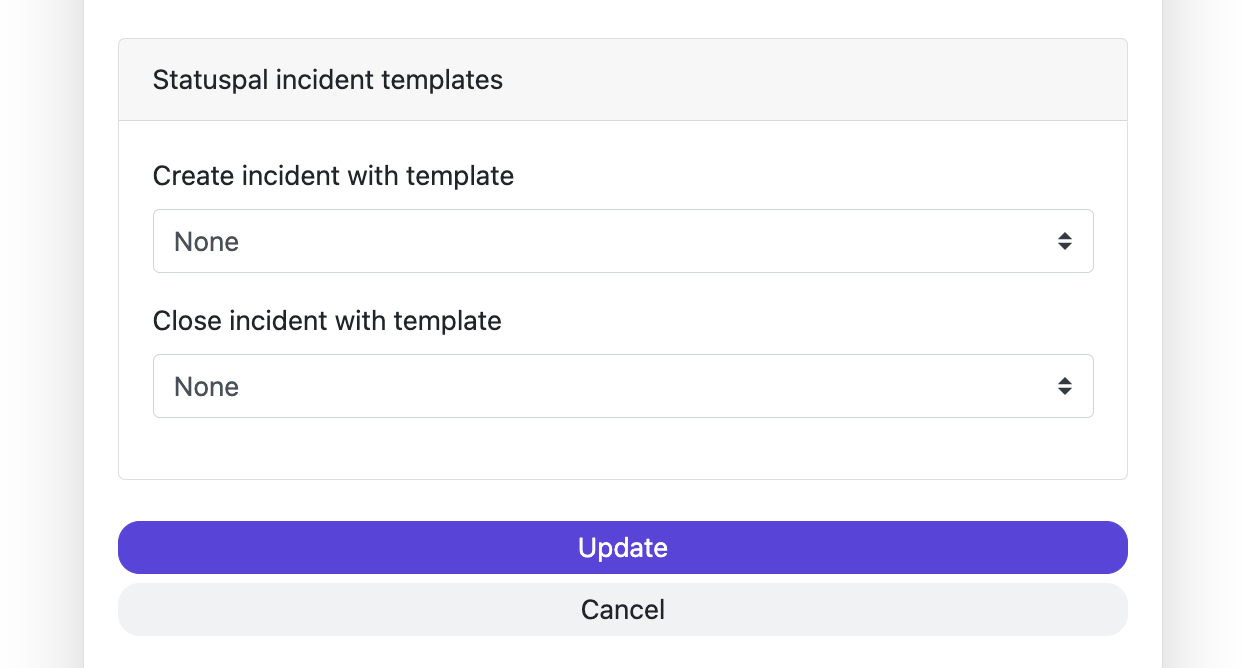
You can also decide to use Statuspal incident templates in order to customize the content of the incidents automatically created from PagerDuty:

In the Statuspal incident templates you select above, you can use template variables with the data coming from PagerDuty in the format {{pagerduty.incident.variable_name}}; For example {{pagerduty.incident.title}}.
Template Variables
You can reference any variable coming from the PagerDuty webhook payload data object (see their docs to see the full list: https://developer.pagerduty.com/docs/webhooks-overview#incident).

For incident creation we use the incident.acknowledged and incident.triggered webhook events. To close the incident we use the incident.resolved webhook event.
Once you have configured one or more rules, incidents in Statuspal should be automatically created/closed based on your PagerDuty incidents.
How to Uninstall
In your Statuspal admin site, click on Integrations and find the PagerDuty integration and click on Delete, click no OK to confirm. The integration should be permanently deleted from Statuspal.
Last updated